Christmas Clown Embroidery: Whimsy That Stitches Well
A Real-World First Impression — Before the Hoop Goes On
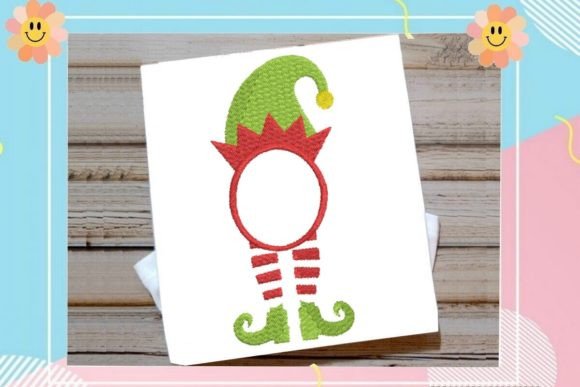
When I opened Christmas Clown Embroidery for the first time, what struck me wasn’t just the jolly red nose or the candy-cane striped sleeves—it was how immediately *readable* the motif felt at a glance. This isn’t a cluttered holiday mashup; it’s a focused, balanced machine embroidery design with clear silhouette, intentional negative space, and a smile that lands—warm but not saccharine. As a designer who’s stitched hundreds of seasonal motifs for client projects, I appreciate when a Christmas embroidery file avoids visual noise. The clown’s pose is upright and centered, making it ideal for vertical applications: think tote bag front panels, pillow covers, or the chest area of a child’s sweatshirt.
Where It Shines — And Why Your Customers Will Notice
I recently tested Christmas Clown Embroidery on a natural linen tea towel for a local boutique’s holiday line. The result? A standout piece—playful but polished. The design’s moderate detail level (no micro-faces or overly tight satin stitch borders) held up beautifully on mid-weight fabric without puckering or thread breakage. That’s key for small shop owners and Etsy sellers: consistency across batches builds trust. Buyers don’t just buy a clown—they buy a *feeling*: nostalgic, inclusive holiday cheer that doesn’t lean into tired tropes. I’ve seen this resonate especially well on baby embroidery (onesies, burp cloths) and unisex apparel like crewneck sweatshirts—where whimsy reads as thoughtful, not childish.
For craft business owners building cohesive collections, Christmas Clown Embroidery slots cleanly into a “non-traditional holiday” theme—alongside snowmen with guitars or reindeer in bow ties. It’s distinctive enough to stand alone on a patch or embroidered cap, yet flexible enough to pair with simple text (“Joy,” “Ho Ho Ho,” or even a monogram) without competing.
Where to Proceed With Care — Not Every Fabric Is Equal
Let’s be real: not all surfaces welcome whimsy equally. On thin cotton t-shirts, I recommend testing Christmas Clown Embroidery with lightweight cutaway stabilizer—its fill stitch areas (like the hat and scarf) can telegraph through light fabrics if under-stabilized. On stretchy knits or curved surfaces like structured caps, the design’s clean outline helps, but you’ll want to baste carefully and consider reducing density slightly in the satin-stitched brim if your machine tends toward heavy buildup.
Dark fabric? No problem—but inspect the thread color contrast in your digital embroidery file preview. Some versions default to high-contrast white-on-red, which pops on navy or charcoal, but may mute on black. Likewise, avoid placing the full motif on highly textured fabrics (like bouclé or thick terry) unless you’re willing to add extra topping stabilizer—the clown’s facial details and buttons rely on crisp definition.
Small Hoop Limitations? Know Your Boundaries
The design fits comfortably in a 5x7 hoop, but pushing it into a 4x4 requires scaling down—and that’s where judgment matters. Those little polka dots on the collar? They vanish below 85% size. If you’re planning embroidered patches or tiny apron accents, verify whether the file includes a simplified alternate version. If not, treat Christmas Clown Embroidery as a medium-to-large focal point—not a subtle accent.
How It Shapes Perception — Beyond the Stitch
In handmade product markets, perception is part of the value. A well-executed Christmas Clown Embroidery signals care: the balanced stitch density means no stiff, plasticky patches; the thoughtful layout ensures alignment stays true across multiple items; and the cheerful, inclusive vibe invites gifting—not just seasonal decor. For wedding gift embroiderers or boutique brands, that emotional resonance translates directly into higher perceived value and repeat orders.
I’ve used it in printable mockups for an Etsy seller launching a holiday-themed nursery collection—and buyers responded strongly to how “alive” the clown looked on a soft gray blanket mockup. That’s not just about the design—it’s about how clearly the embroidery file renders texture, dimension, and personality before a single stitch is made.
Practical Designer Notes — Skip the Guesswork
- Always test first: Run Christmas Clown Embroidery on scrap fabric matching your final project’s weight and weave—even if it’s “just a tote bag.”
- Check thread colors: Swap out default reds and whites for richer burgundies or cream threads to elevate handmade presentation.
- Review stitch density: Dense fill areas (hat, scarf) may need slight adjustment on delicate fabrics—consult your machine’s manual before scaling.
- Confirm hoop size and licensing: Since no specific dimensions or commercial terms are listed, verify file compatibility and usage rights before selling finished products or bundling as design assets.
- Mock it both ways: Preview Christmas Clown Embroidery on light and dark backgrounds—and in grayscale—to assess clarity and contrast without color bias.
- Stabilizer strategy: Medium-weight cutaway works best for most uses; tear-away suffices only for stable wovens like quilting cotton or canvas.
Final Thought — A Design That Earns Its Place
Christmas Clown Embroidery isn’t just festive filler. It’s a considered, stitch-ready motif that balances charm with craftsmanship. Whether you’re prepping custom apparel for a holiday pop-up, building digital embroidery file bundles for fellow designers, or stitching personalized gifts for clients, this design earns its spot by delivering consistent results—not just holiday hype. It reminds us that great embroidery isn’t about how much you can fit in, but how clearly you can say something joyful, memorable, and true to hand.